 PREVIOUS ARTICLE
Here’s the cake I’ve been excited to show you! When Toby and I were discussing ideas for his birthday, I casually mentioned something that was cool when I was younger, and he lost his little mind…
Photo cakes! Toby couldn’t believe it and became enamored of the idea. He knew the exact cake he wanted (M&M), and he definitely knew the photo he wanted: the one above, where he’s standing in front of a Dodge Challenger we rented once in Austin. The only thing left to do was figure out how to execute his vision. After a little online research, I found Cakes n’ Shapes, a New York-based bakery that ships edible “frosting sheets” nationwide.
Here’s how to do it.
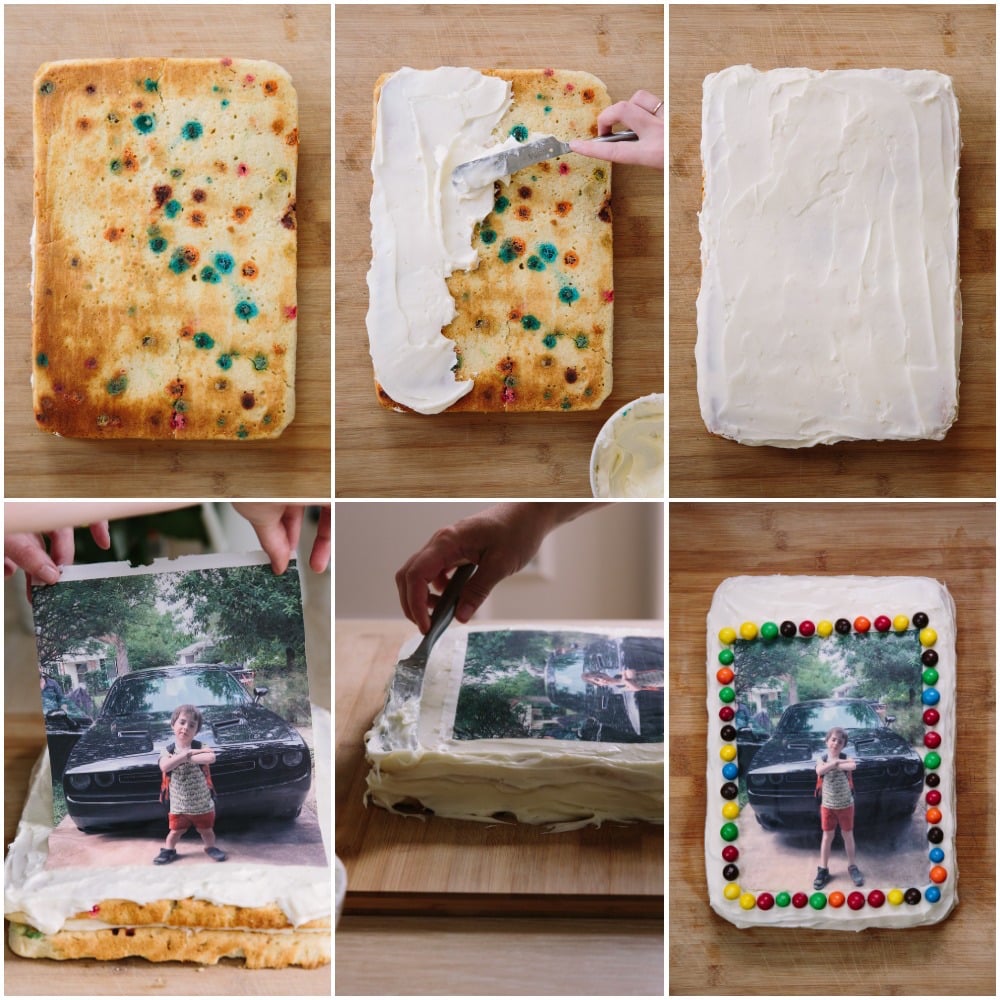
1. Bake a cake. (Beforehand, email your photo to Cakes n’ Shapes and select the size. We went with the 7.3-by-10 inch sheet. You can pick it up in Manhattan or have it mailed to you.)
2-3. Frost the top of the cake. Frosting must be fresh, moist and white (we went with cream cheese frosting), so the edible photo will stick to it.
4. Peel off the protective layer of the photo and smooth out the photo sheet very carefully.
5. Frost the sides of the cake and around the photo.
6. We added M&Ms to “frame” the photo.
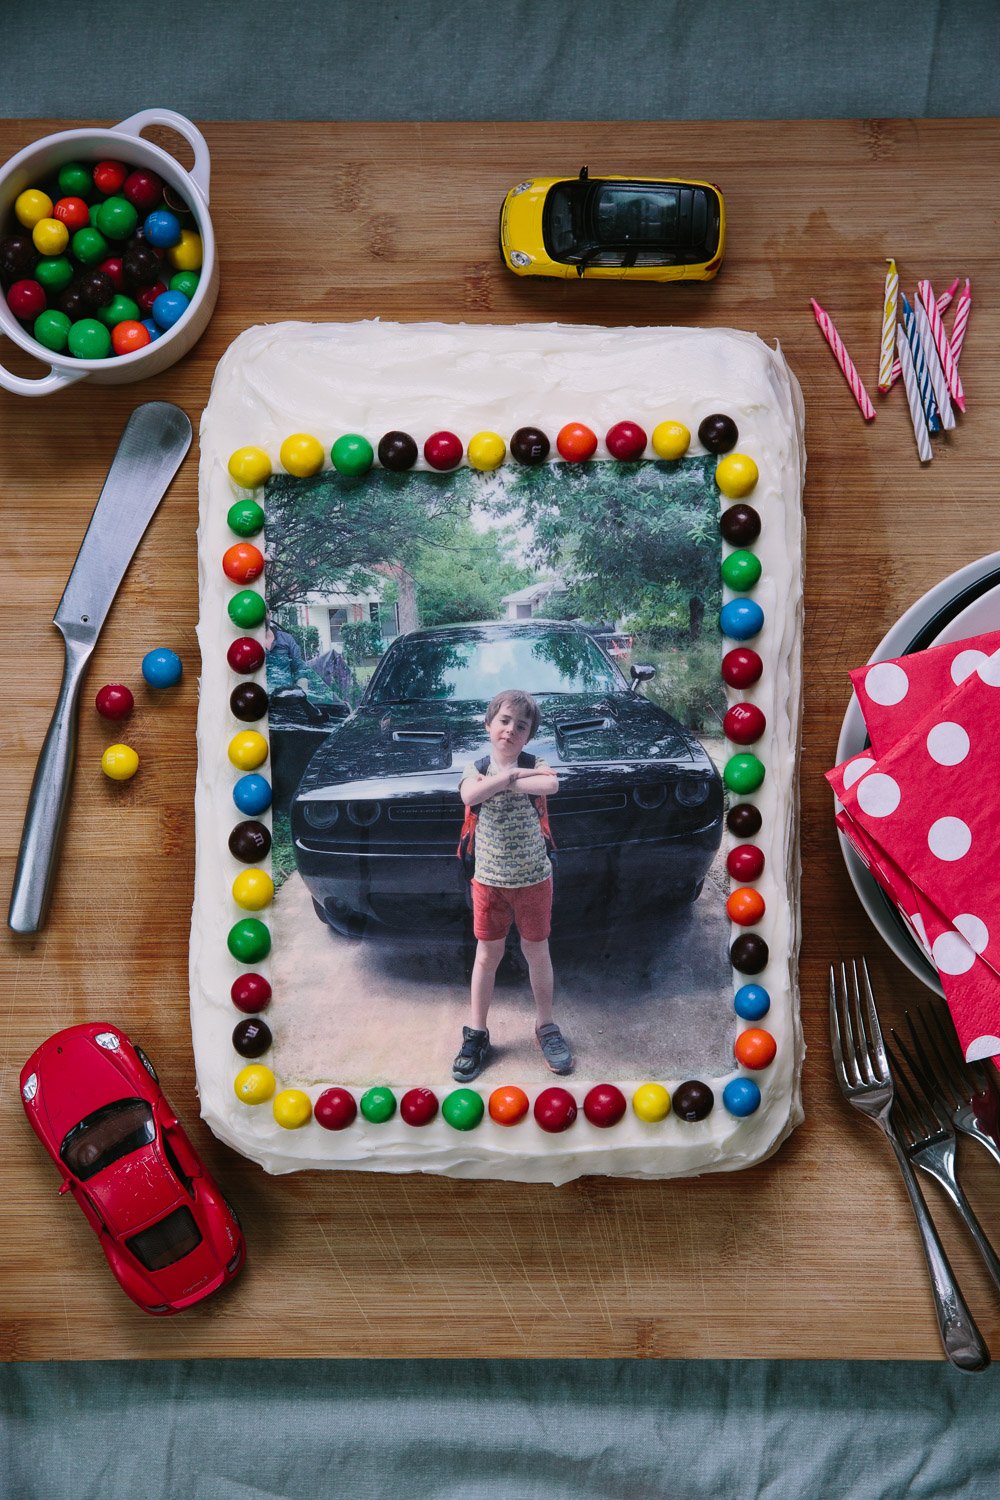
The cake was a huge hit at the party, and the cutest part was watching Toby figure out which piece of the photo to eat. (After some consideration, he went with the Challenger logo on the front fender.) Now I can’t stop thinking about grown-up occasions — wedding anniversaries, friends’ birthdays, office celebrations — where this move would kill, especially with a funny photo.
Thoughts? Have you ever had a photo cake? I remember dirt cakes were also cool when I was growing up!
P.S. 8 wonderful birthday cakes, and the easiest birthday cake. And the funniest candles.
(Photos by Christine Han for Cup of Jo. Thank you to Grace Blumberg for baking and styling.)

