
When I was in high school, I fell in love. Not with a person. With a hair tool…
A hot air brush is essentially what you’d get if a round brush and a hairdryer had a baby. I’ve never been able to master that whole holding-a-round-brush-and-blow-dryer-at-the-same-time thing necessary for creating blow-outs at home. But this little tool — which blows hot air — cuts out the middle man. With a tiny bit of practice, you can get a smooth, professional-looking blow out at home.
For the past 20 years, it has been my savior for weddings, first dates, interviews, and everyday. I use this one, which typically retails for around $20. But they also make fancy versions, if you’re into that kinda thing.
We first posted about this one million years ago, but have gotten requests for a tutorial. So, here’s how to use it:
Start with towel-dried hair. For best results, I like my hair to be in a place where it’s definitely still wet, but well past the point of dripping.

Gather the top half of your hair and secure it on top of your head. (I use one of these clips because it’s easy to secure with one hand and makes me feel more legit. But you can also use a soft scrunchy or any other plastic hair clip. Just avoid elastics, which can cause breakage.)

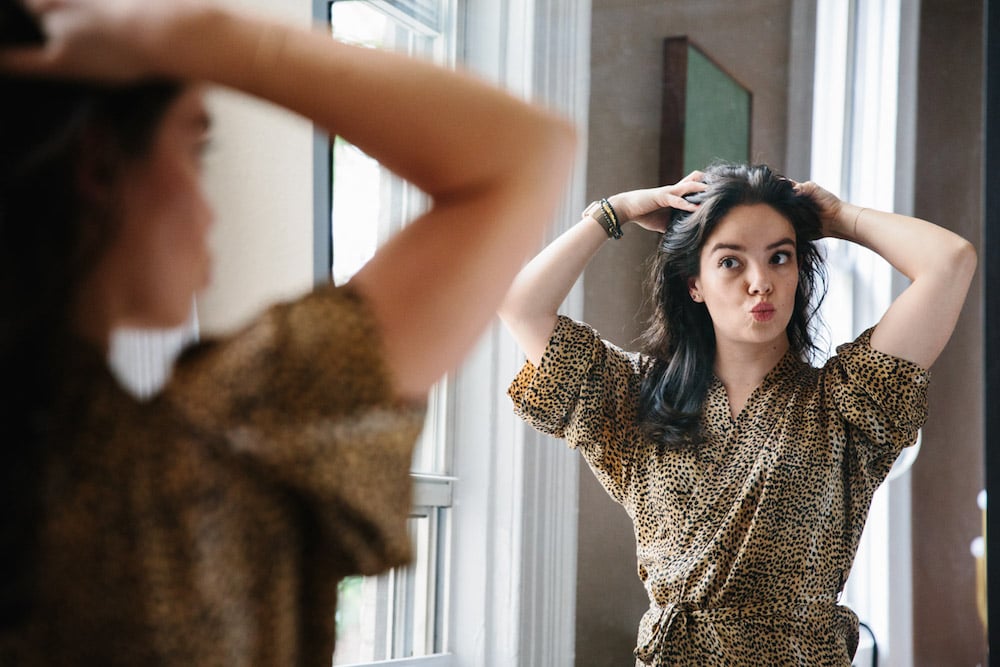
Begin drying the bottom portion of your hair, one section at a time. I gather two-inch-ish sections — you want to make sure the entire piece is getting exposed to the heat, but also that you’re covering enough so that you can dry your whole head in a reasonable amount of time. Start at the roots and move the brush downward, as if you were brushing your hair super slowly. You want to (gently) pull the hair a little bit taut with one hand as you brush it with the other — this is key to create smoothness.

Once the bottom half of your hair is dry, unclip the top portion and dry it in the same way, going section by section. I’ll hold these sections straight outward as I brush, to create more volume. If you want a sleeker look, then continue to brush them straight down.

At the bottom of each section, turn the brush upwards for one full rotation, which lends a bit of smoothness to the tips. You don’t need to wrap it around and around (and risk creating a tangle of doom) — just once around the brush will do.

When I’m almost done, I’ll concentrate on the topmost section of hair, on the crown of my head. Hold the hair straight up as you brush, again to help create volume.

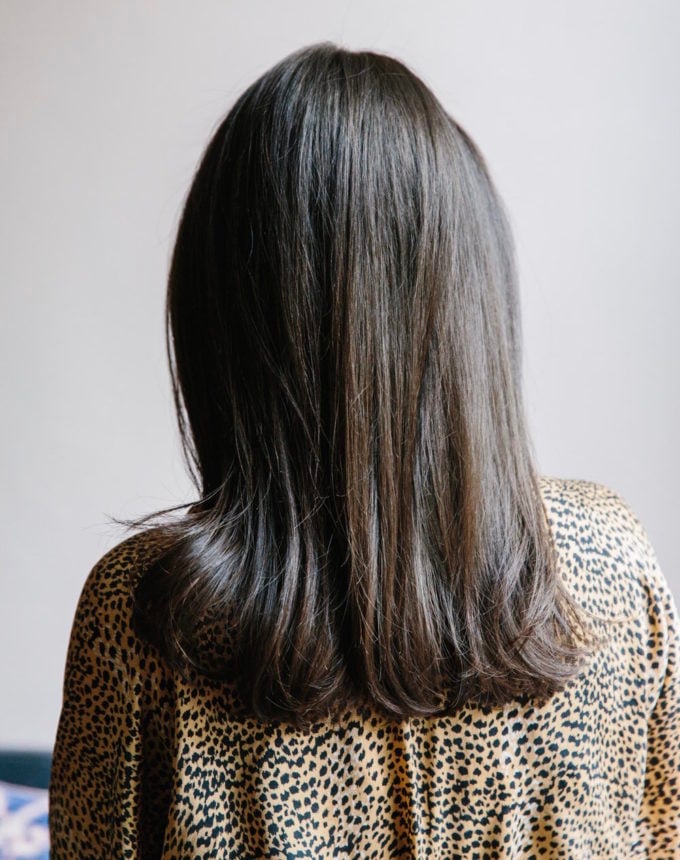
That’s it! The entire thing takes me around 10 to 15 minutes. People ask ALL THE TIME if I’ve gotten a blow out, and I am happy to report that I have no special skills. It’s all just because of this magical tool.
Do you have any hair tools or tips you can’t live without? Would love to hear.
P.S. The one beauty product I always finish and more hair tutorials, including a braided top bun and three tricks for parting your hair.
(Photos by Christine Han for Cup of Jo.)